介绍ios开发中关于xcode工具使用、开发、打包、测试、条件编译、发布到应用市场等使用最佳实践
xcode应用测试与发布三种方式
- pgyer
- fir
- TestFlight
加快xcode编译
-
build settings 改为dwarf 禁止sym,注意运行时没有dwarf,会没有调试堆栈
-
提高XCode编译时使用的线程数
defaults write com.apple.Xcode PBXNumberOfParallelBuildSubtasks 6 (cpu*1.5) -
build settings 的 Build Active Architecture Only 改为yes(此选项在Release模式下必须为No,否则发布的ipa在部分设备上将不能运行。)
使用快捷键,增加terminal或者外部工具
preferences(cmd+,) -> behavior -> + -> run script 和快捷键
条件编译(针对不支持模拟器的一些库),或者使用不同的settings
通过new file,增加settings bundle
##bash中使用${},xcode编译配置中使用$() 根据条件添加文件编译,文件可以在settings.bundle中
if [ "${CONFIGURATION}" == "Debug" ]; then
    cp -r "${PROJECT_DIR}/Settings.bundle" "${BUILT_PRODUCTS_DIR}/${PRODUCT_NAME}.app"
fi
使用 去除不必要的framework build settings > other linker flag > “Any iOS Simulator SDK"键入-weak_framework Xxx
条件编译参考
- Build Settings > Build Options > Excluded Source File Names 或者使用 file > workspace settings 使用build system > legacy build system
target’s Build Settings > Tap the + button > Add User-Defined Setting The key is either
INCLUDED_SOURCE_FILE_NAMESorEXCLUDED_SOURCE_FILE_NAMES填写排除的xxx.framework名字
-
swift/objc 代码中环境变量
/**
TARGET_OS_WIN32           - Generated code will run under 32-bit Windows
TARGET_OS_UNIX            - Generated code will run under some Unix (not OSX)
TARGET_OS_MAC             - Generated code will run under Mac OS X variant
   TARGET_OS_IPHONE          - Generated code for firmware, devices, or simulator
      TARGET_OS_IOS             - Generated code will run under iOS
      TARGET_OS_TV              - Generated code will run under Apple TV OS
      TARGET_OS_WATCH           - Generated code will run under Apple Watch OS
   TARGET_OS_SIMULATOR      - Generated code will run under a simulator
   TARGET_OS_EMBEDDED       - Generated code for firmware
**/

#if !TARGET_OS_IPHONE && !TARGET_OS_SIMULATOR && !TARGET_OS_EMBEDDED
    // macOS-only code
#endif

#if TARGET_OS_SIMULATOR
  // Simulator code
#endif

// from Swift 4.1:
#if !TARGET_IPHONE_SIMULATOR

#if targetEnvironment(simulator)
    // code for the simulator here
#else
   // code for real devices here
#endif

#if TARGET_OS_IPHONE
// iOS code
#else
// OSX code
#endif
cocoapod hook
增加钩子修改参数
pre_install,post_install(修改完写入Xcode project前),post_integrate(修改完写入磁盘后),post_integrate(修改完写入磁盘前)
post_install do |installer|
    installer.aggregate_targets.each do |aggregate_target|
        aggregate_target.xcconfigs.each do |config_name, xcconfig|
            if aggregate_target.name == 'Pods-GYDApp'
              xcconfig_path = aggregate_target.xcconfig_path(config_name)
              #给生成的debug.xcconfig/release.xcconfig中增加一行
              File.open(xcconfig_path, "a") {|file| file.puts '#include? "UniMP/Custom/XConfig/unimp.xcconfig"'}
              #xcconfig.other_linker_flags << '-l"AFNetworkingXXX"'
            end
        end
    end
end
#修改libraries的参数(-l),:
post_install do |installer|
    installer.aggregate_targets.each do |aggregate_target|
        aggregate_target.xcconfigs.each do |config_name, xcconfig|
            if aggregate_target.name == 'Pods-GYDApp'
             #:frameworks,等
            xcconfig.other_linker_flags[:libraries] << 'AFNetworkingXX'


            xcconfig_path = aggregate_target.xcconfig_path(config_name)
            xcconfig.save_as(xcconfig_path)
            end
        end
    end
end
# 修改编译参数
post_install do |installer|
  # 1. 遍历项目中所有target
  installer.pods_project.targets.each do |target|
    # 2. 遍历build_configurations
    target.build_configurations.each do |config|
      # 3. 修改build_settings中的ENABLE_BITCODE
      config.build_settings['ENABLE_BITCODE'] = 'NO'
    end
  end
end
插入脚本
其中:[CP]开头的,就是CocoaPod插入的脚本
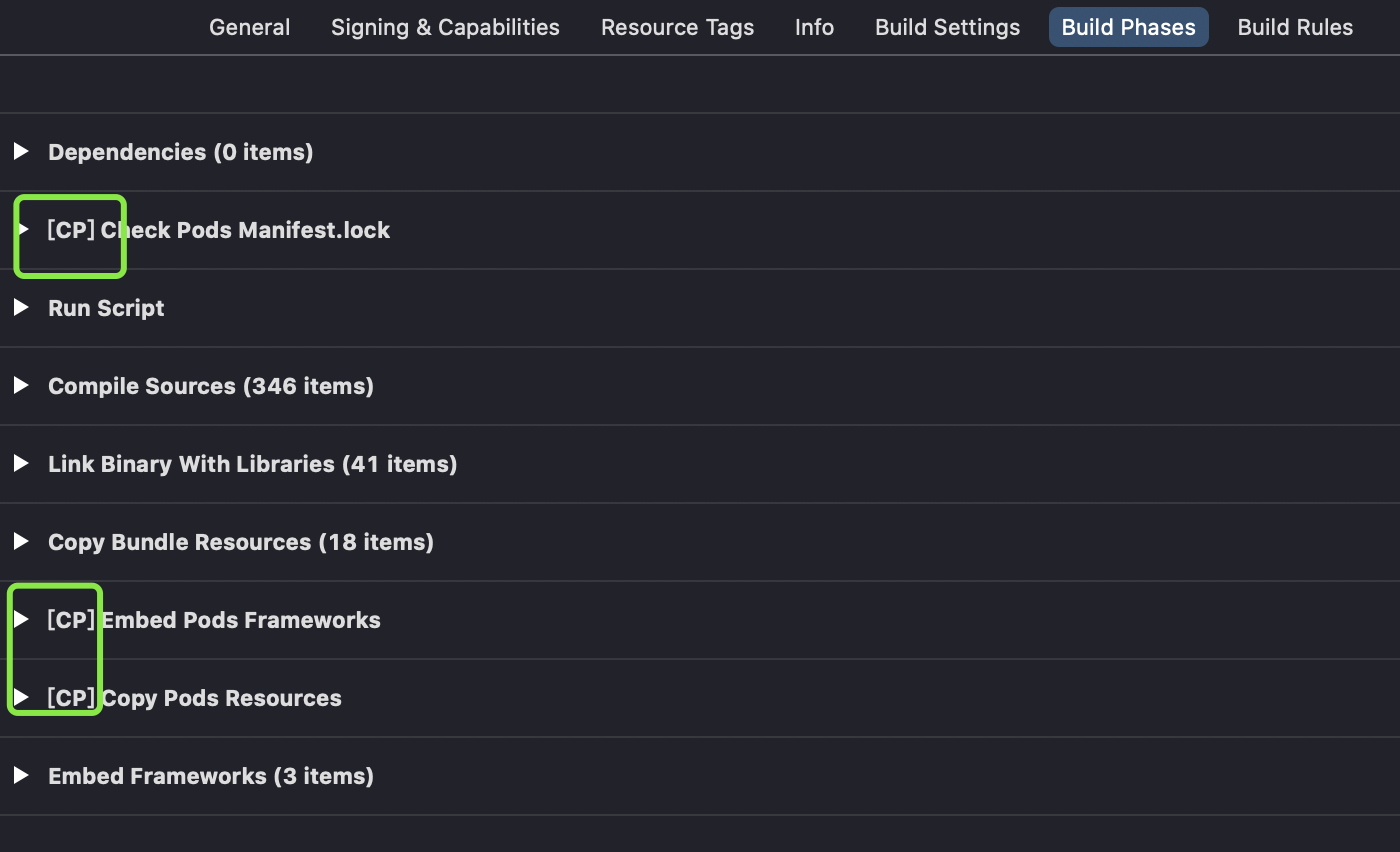
Check Pods Manifest.lock,用来检查cocoapod管理的三方库是否需要更新
Embed Pods Framework,运行脚本来链接三方库的静态/动态库
Copy Pods Resources,运行脚本来拷贝三方库的资源文件
环境变量
#ifdef DEBUG
//...
#else
//...
#endif

#ifdef TESTMODE
//测试服务器相关的代码
#else
//生产服务器相关代码
#endif
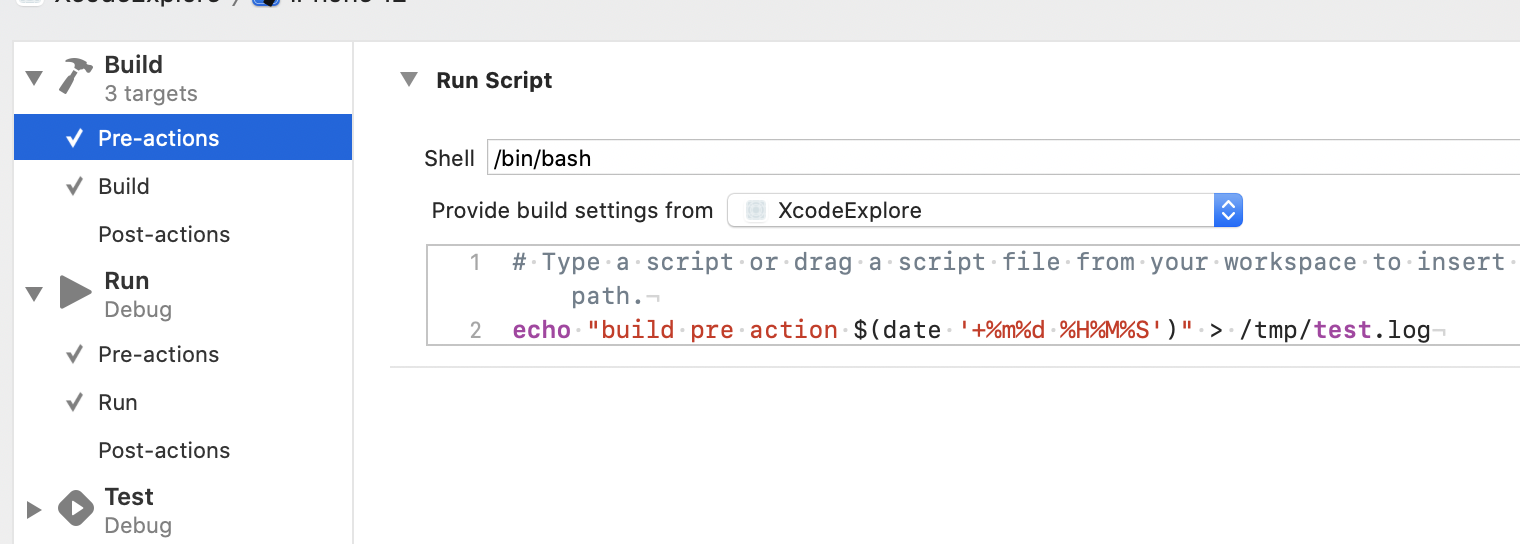
获取方法,可以 build phases 添加run script ,然后脚本中运行 set /export 导出到文件,也可以脚本中加入错误代码,让ide报错查看
1. @executable_path

可执行文件的路径,例如/Applications/WeChat.app/Contents/MacOS

2. @loader_path

被加载的二进制的路径,若该二进制是可执行文件,则@loader_path等价于@executable_path。

适用于非可执行二进制嵌套的场景,例如frameworkA包含frameworkB,frameworkB的加载路径就可以根据frameworkA的@loader_path给出。

3. @rpath

即run path,对应于工程配置中的Runpath Search Paths。是一个或者多个路径的列表,类似于环境变量$PATH。
xcode中常见环境变量
$(SRCROOT) 自动变成当前工程根目录
$(TARGETNAME)、ARCHS、ARCHS_STANDARD = arm64 x86_64
$(EXECUTABLE_NAME)、PRODUCT_NAME
$(ACTION) 、NATIVE_ARCH= x86_64
Prefix Header:*-Prefix.pch,预编头文件 ,Precompile Prefix Header:设为“Yes”,表示允许加入预编译头
$(BUILT_PRODUCTS_DIR)/include
$(CONFIGURATION) 通过设置改变
${CONFIGURATION}-iphoneos 表示Debug-iphoneos
$(CURRENTCONFIG_DEVICE_DIR)
$(PLATFORM_NAME)
$(CURRENT_PROJECT_VERSION)
$(BUILT_PRODUCTS_DIR) 最终产品路径
SDK_NAMES= SDK_NAME iphonesimulator14.4
$(SYMROOT) = $()/Build/Products
$(BUILD_DIR) = $()/Build/Products
$(BUILD_ROOT) = $()/Build/Products
INCLUDED_SOURCE_FILE_NAMES、EXCLUDED_SOURCE_FILE_NAMES
##bash中使用${},xcode编译配置中使用$() 根据条件添加文件编译,文件可以在settings.bundle中
if [ "${CONFIGURATION}" == "Debug" ]; then
    cp -r "${PROJECT_DIR}/Settings.bundle" "${BUILT_PRODUCTS_DIR}/${PRODUCT_NAME}.app"
fi
#编译
 xcodebuild -project "${TARGET_NAME}.xcodeproj" -configuration "${CONFIGURATION}" -target "${TARGET_NAME}" -sdk "${OTHER_SDK_TO_BUILD}" -arch "${ARCH_TO_BUILD}" ${ACTION} RUN_CLANG_STATIC_ANALYZER=NO BUILD_DIR="${BUILD_DIR}" BUILD_ROOT="${BUILD_ROOT}" > "${BUILD_ROOT}.build_output"
lipo 包合并与拆分
针对Mac-O的文件二进制格式 .o 到.a ,.a到.o的抽取,不同arch架构文件的获取,以及头等信息查看
create or operate on universal files 源于mac系统要制作兼容powerpc平台和intel平台的程序。
是管理Fat File的工具, 可以查看cpu架构, 提取特定架构,整合和拆分库文件
#抽取arm文件
lipo xxx.a -thin armv7 -output armv7.a
# 合成一个库的两个不同CPU架构的库为一个
lipo -create xxx.a xxx.a -output xxx.a

#链接合并.o文件为.a文件
libtool -static -o ../xxx.a *.o
XCODE
swift和xcode混合编译
Build settings 设置 objective-c bridging header 否则不生效
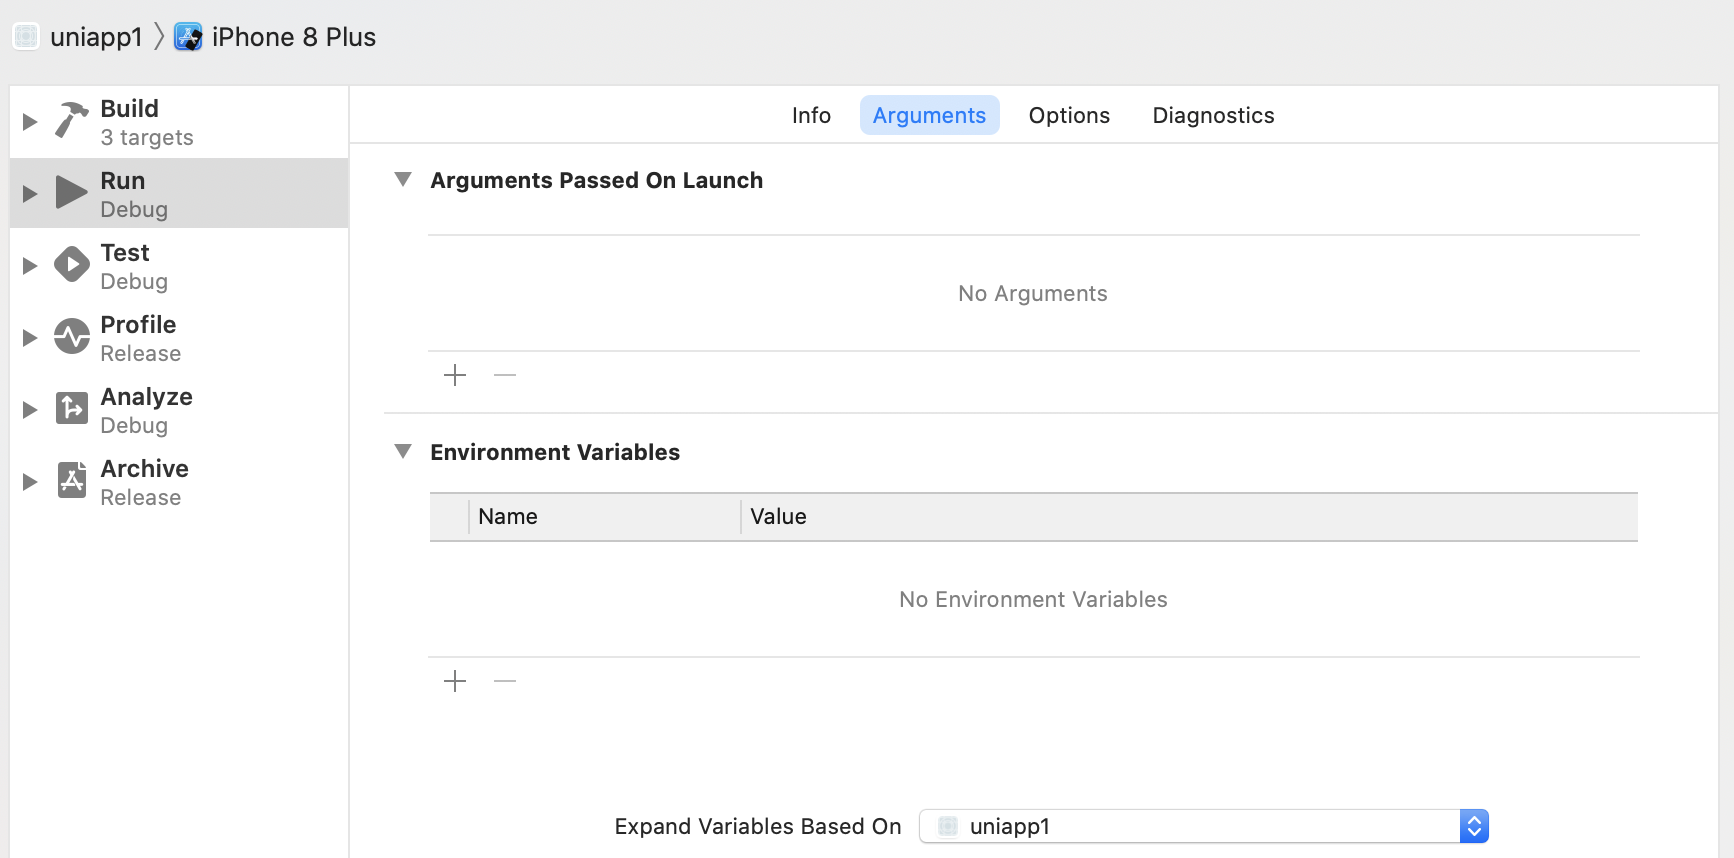
启动参数
获取启动参数,edit scheme -> 配置启动参数
NSDictionary * environments = [[NSProcessInfo processInfo] environment];
BOOL logOn = [[environments objectForKey:@"Network_Log_Enabled"] isEqualToString:@"YES"];
全部的配置分布在Info Arguments options Diagnostics
-AppleLanguages (zh-Hans) 中文
-NSDoubleLocalizedStrings YES 实现本地化
-com.apple.CoreData.SQLDebug 3 coredata跟踪,log等级分为1到3,越高越详细
-com.apple.CoreData.SyntaxColoredLogging YES 日志语法高亮
获取启动main和main后函数
#增加 Environment Variable
DYLD_PRINT_STATISTICS
DYLD_PRINT_STATISTICS_DETAILS

###其他调试变量
DYLD_FRAMEWORK_PATH
DYLD_FALLBACK_FRAMEWORK_PATH
DYLD_VERSIONED_FRAMEWORK_PATH
DYLD_LIBRARY_PATH 打印库路径
DYLD_FALLBACK_LIBRARY_PATH
DYLD_VERSIONED_LIBRARY_PATH
DYLD_PRINT_TO_FILE
DYLD_SHARED_REGION
DYLD_INSERT_LIBRARIES
DYLD_FORCE_FLAT_NAMESPACE
DYLD_IMAGE_SUFFIX
DYLD_PRINT_OPTS
DYLD_PRINT_ENV 打印环境变量
DYLD_PRINT_LIBRARIES
DYLD_BIND_AT_LAUNCH
DYLD_DISABLE_DOFS
DYLD_PRINT_APIS 打印APIS
DYLD_PRINT_BINDINGS
DYLD_PRINT_INITIALIZERS
DYLD_PRINT_REBASINGS
DYLD_PRINT_SEGMENTS
DYLD_PRINT_STATISTICS 打印统计
DYLD_PRINT_DOFS
DYLD_PRINT_RPATHS 打印路径
DYLD_SHARED_CACHE_DIR
DYLD_SHARED_CACHE_DONT_VALIDATE
Zombie
#开启Zombie,当对象被释放后,他们仍然在内存里,只不过视图访问僵尸对象会报错,可以用于调试EXC_BAD_ACCESS
NSZombieEnabled YES
## NSDeallocateZombies,这样僵尸对象的内存会被释放调
NSDeallocateZombies YES
#MallocGuardEdges
在分配大内存的时候,在内存前后添加额外的页,进行内存保护。

#MallocScribble
对于释放的内存,每个Byte填充成0x55,能够提高野指针的crash率。


##MallocGuard
开启Malloc Guard后,在调试的时候会使用libgmalloc替换malloc,从而在当内存出现错误的时候,及时crash你的App
编译过程
-
dSYM 文件
我们在每次编译过后,都会生成一个dsym文件。dsym文件中,存储了16进制的函数地址映射
-
attribute用法
__attribute__语法格式为:__attribute__ ((attribute-list))放在声明分号“;”前面。#函数属性 (Function Attribute) #类型属性 (Variable Attribute ) #变量属性 (Type Attribute ) __attribute__ ((warn_unused_result)) //如果没有使用返回值,编译的时候给出警告//弃用API,用作API更新 #define __deprecated __attribute__((deprecated)) //带描述信息的弃用 #define __deprecated_msg(_msg) __attribute__((deprecated(_msg))) //遇到__unavailable的变量/方法,编译器直接抛出Error #define __unavailable __attribute__((unavailable)) //告诉编译器,即使这个变量/方法 没被使用,也不要抛出警告 #define __unused __attribute__((unused)) //和__unused相反 #define __used __attribute__((used)) //如果不使用方法的返回值,进行警告 #define __result_use_check __attribute__((__warn_unused_result__)) //OC方法在Swift中不可用 #define __swift_unavailable(_msg) __attribute__((__availability__(swift, unavailable, message=_msg)))-
clang编译警告 代码中插入 在build settings 中,增加代码质量可以设置严格参数
#warning "This method can not be used"
#error "error msg"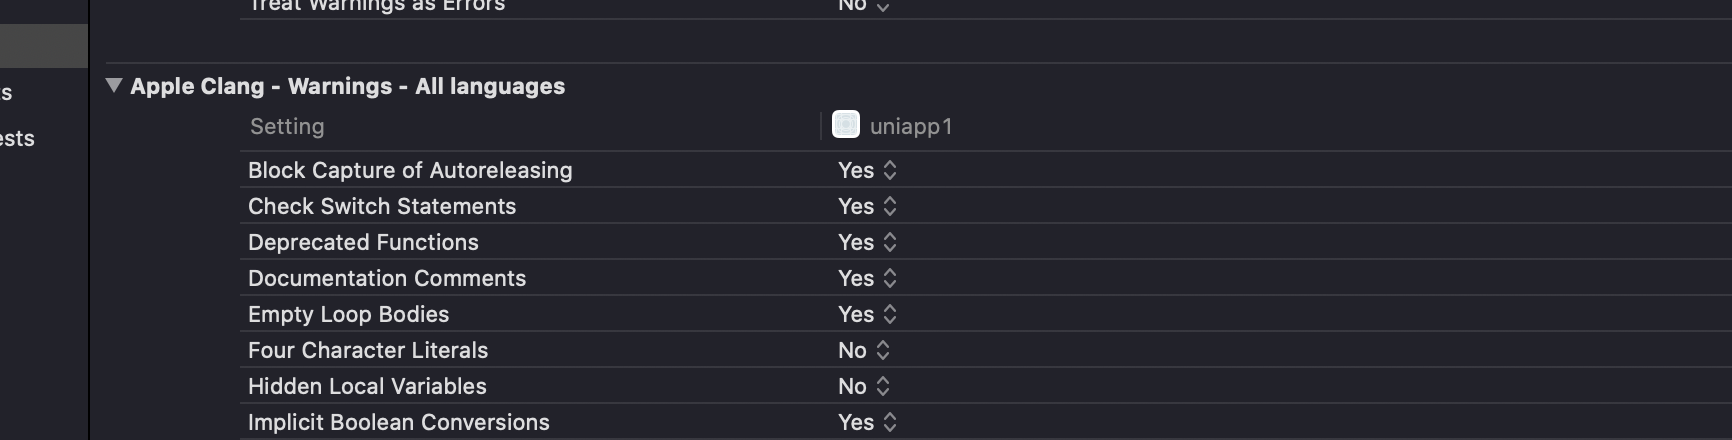
编译打包命令
Info/man xcodebuild 查看帮助
//编译成.app xcodebuild -workspace $projectName.xcworkspace -scheme $projectName -configuration $buildConfig clean build SYMROOT=$buildAppToDir //打包 xcrun -sdk iphoneos PackageApplication -v $appDir/$projectName.app -o $appDir/$ipaName.ipa 通过info命令,可以查看到详细的文档 info xcodebuild -
cathage vs cocoapods打包工具比较
创建一个Cartfile,包含你希望在项目中使用的框架的列表
运行Carthage,将会获取列出的框架并编译它们
将编译完成的.framework二进制文件拖拽到你的Xcode项目当中
- cathage简单不修改 xcodeworkspace,cocoapod是中心化的
- Carthage使用xcodebuild来编译框架的二进制文件,但如何集成它们将交由用户自己判断。CocoaPods的方法更易于使用,但Carthage更灵活并且是非侵入性的
- Carthage创建的是去中心化的依赖管理器。它没有总项目的列表,这能够减少维护工作并且避免任何中心化带来的问题
xcode的CI/CD,进行命令行打包的工具列表
- xctool
- ios-sim 安装完后需要到 安装目录里面执行yarn 解决node modules安装错误
- ios-deploy
- Fastlane
- pgyer
- fir
- TestFlight
调试API
1. #if 条件编译
#if DEBUG
let apiBaseURL = URL(string: "https://api.staging.example.com")!
#else
let apiBaseURL = URL(string: "https://api.example.com")!
#endif
-
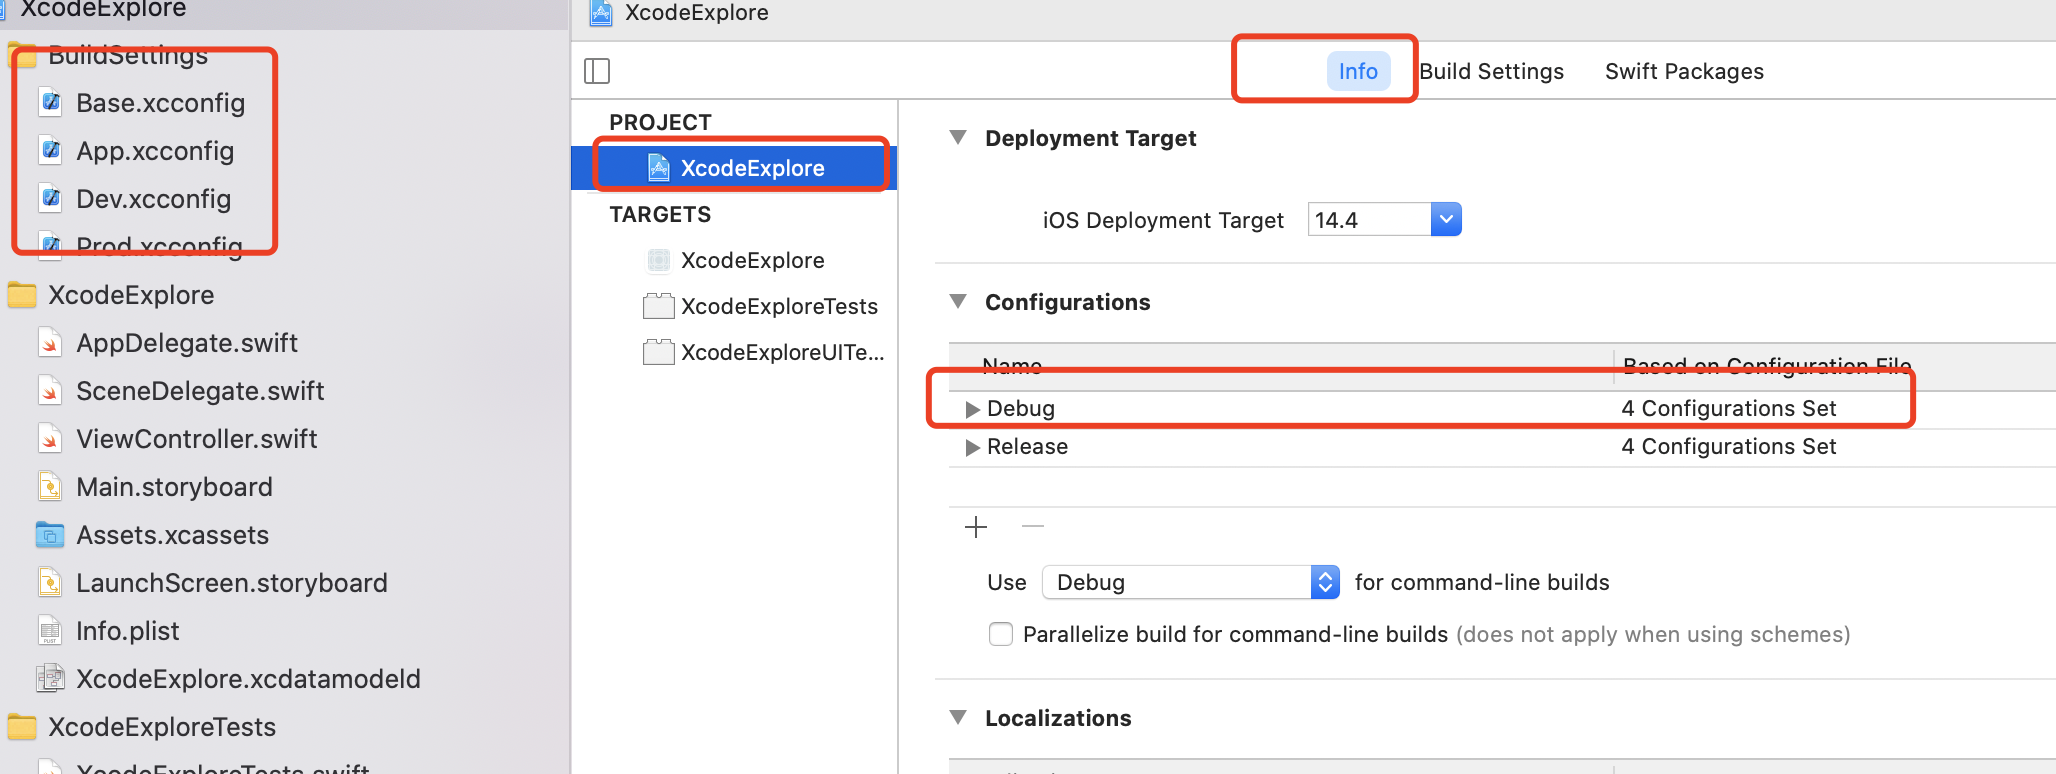
xcconfig
-
使用钩子,build,run,替换Info.plist等
xcconfig配置
#include "path/to/File.xcconfig"
BUILD_SETTING_NAME[sdk=sdk][arch=architecture]
OTHER_LDFLAGS = $(inherited) -weak_framework RevealServer
FRAMEWORK_SEARCH_PATHS = $(inherited) /Applications/Reveal.app/Contents/SharedSupport/iOS-Libraries
## 接着在Info.plist里配置变量 API_XXX  = $(API_URL),可以从运行时候读取变量
## Bundle.main.object(forInfoDictionaryKey:key)
API_URL=dev.cc
创建configuration list file
配置环境变量、编译变量、覆盖编译行为,链接框架路径选择等
指定生效的target
xcode导入文件的两种选择:
(1)create groups:相当于添加了一个groups,会以黄色文件夹的形式存在,调用文件中的某个类时,直接包含头文件就可以调用。(文件会被编译)
(2)create folder references:只是将文件单纯的引用了,会以蓝色文件夹的形式存在,使用时需要加入其路径,否则会导致数据为空。(文件不会被编译)
xcode 文件介绍
project.pbxproj
framework中optional和required的区别
(1)Require:强引用,一定会被加载到内存中,及时不使用也会被加载到内存中。
(2)Optional:弱引用,开始的并不会加载,在使用的时候才会加载,会节省加载时的时间。
或者使用-weak_framework
有一些库,如Social.framework和AdSupport.framework,是在IOS6之后才被引入的,更新了一些新的特性,如果运行在5.0甚至更低的设备上,这些库不支持,会编译通不过,这时候就要使用弱引用了。
UserInterfaceState.xcuserstate 用户的xcode ide使用的状态,可忽略
如果该文件损坏,会导致ide打开,没有编译工具栏等, 可以直接删除它
plutil -convert xml1 /Users/i/htdocs/i/XcodeExplore/XcodeExplore.xcodeproj/project.xcworkspace/xcuserdata/i.xcuserdatad/UserInterfaceState.xcuserstate -o output
xcshareddata ide是用户的编译设置
pbxproject中的UUID生成方法(生成24位本机唯一的UUID代码)
class XcodeUUIDGenerator

    def initialize
        @num = [Time.now.to_i, Process.pid, getMAC]
    end

    # Get the ethernet hardware address ("MAC"). This version
    # works on Mac OS X 10.6 (Snow Leopard); it has not been tested
    # on other versions.

    def getMAC(interface='en0')
        addrMAC = `ifconfig #{interface} ether`.split("\n")[2]
        addrMAC ? addrMAC.strip.split[1].gsub(':','').to_i(16) : 0
    end

    def generate
        @num[0] += 1
        self
    end

    def to_s
        "%08X%04X%012X" % @num
    end
end
gen = XcodeUUIDGenerator.new
id1 = gen.generate.to_s
id2 = gen.generate.to_s
id3 = gen.generate.to_s
project.xcworkspace/ ide的设置 可忽略
xcuserdata 可忽略
pod
安装新版本
#更新版本
pod update podName

#解除integrate使用
pod deintegrate
#查看xcode,系统,pod插件版本
pod env
building for iOS Simulator, but linking in object file built for iOS
-
因为编译时候了指定了为模拟器/设备,而连接的时候又包括所有,导致。修改target -》 build settings -> only active arch 为yes
-
打真机包的时候 Excluded Architecture 里的值要去掉
building for iOS Simulator,but linking in object file built for iOS for arm64
- 去掉VALID_ARCHS里面的值
- 或者 EXCLUDEd arch 增加arm64
自动发布bash脚本
#!/bin/sh
#

#rvm system

function failed() {
    echo "Failed: $@" >&2
    exit 1
}

archiveName="XXXX"
projectName="XXXX"
scheme="XXXXX"
configuration="XXXX"
exportOptionsPlist="BuildScript-AppStore/exportOptions.plist"
ipaPath="$PWD/build/${archiveName}/${scheme}.ipa"
appleid="XXX"
applepassword="XXX"

#build clean
xcodebuild clean -project ${projectName} \
                 -configuration ${configuration} \
                 -alltargets || failed "clean error"


#archive
xcodebuild archive -project ${projectName} \
                    -configuration ${configuration} \
                    -scheme ${scheme} \
                    -destination generic/platform=iOS \
                    -archivePath $PWD/build/${archiveName}.xcarchive || failed "archive error"


#Export Complete
xcodebuild -exportArchive -archivePath $PWD/build/${archiveName}.xcarchive \
            -exportOptionsPlist ${exportOptionsPlist} \
            -exportPath ${buildPath}/appStorebuild/${archiveName} \
            -verbose || failed "export error"

#发布到iTunesConnect
altoolPath="/Applications/Xcode.app/Contents/Applications/Application Loader.app/Contents/Frameworks/ITunesSoftwareService.framework/Versions/A/Support/altool"

#validate
"${altoolPath}" --validate-app -f ${ipaPath} -u "$appleid" -p "$applepassword" -t ios --output-format xml || failed "validate error"

#upload
"${altoolPath}" --upload-app -f ${ipaPath} -u "$appleid" -p "$applepassword" -t ios --output-format xml || failed "upload error"


curl -F "file=@${ipaPath}" \
     -F "uKey=XXXX" \
     -F "_api_key=XXXXXX" \
     -F "updateDescription=版本描述" \
    https://www.pgyer.com/apiv1/app/upload || failed "提交蒲公英失败"
调试方式
1. 获取加载的动态链接库
#相当于ldd
otool -L /Applications/WeChat.app/Contents/MacOS/WeChat
2. defaults读写配置的位置
xcode显示编译时间,修改方式
#1. 是编辑了里面选项~/Library/Preferences/com.apple.dt.Xcode.plist
defaults write com.apple.dt.Xcode ShowBuildOperationDuration YES
#2. plistutil 转换plist二进制为xml,修改完后再恢复为二进制
打包三种方式
- archive
- 命令行 获取exportOptions.plist 可以根据模版生成,也可以先用xcode打包,然后解压ipa查看里面内容,拷贝出来,再定制修改
- app拷贝到Payload文件夹,压缩成zip,改名ipa